
About Workflows
Workflows in PoshUI are designed for multi-task automation that requires tracking progress, handling reboots, and providing a professional execution interface.
Key Features
- Multi-Task Execution: Define a sequence of tasks to be executed one after another.
- Two Progress Modes: Auto-progress (simple) or manual progress (precise control).
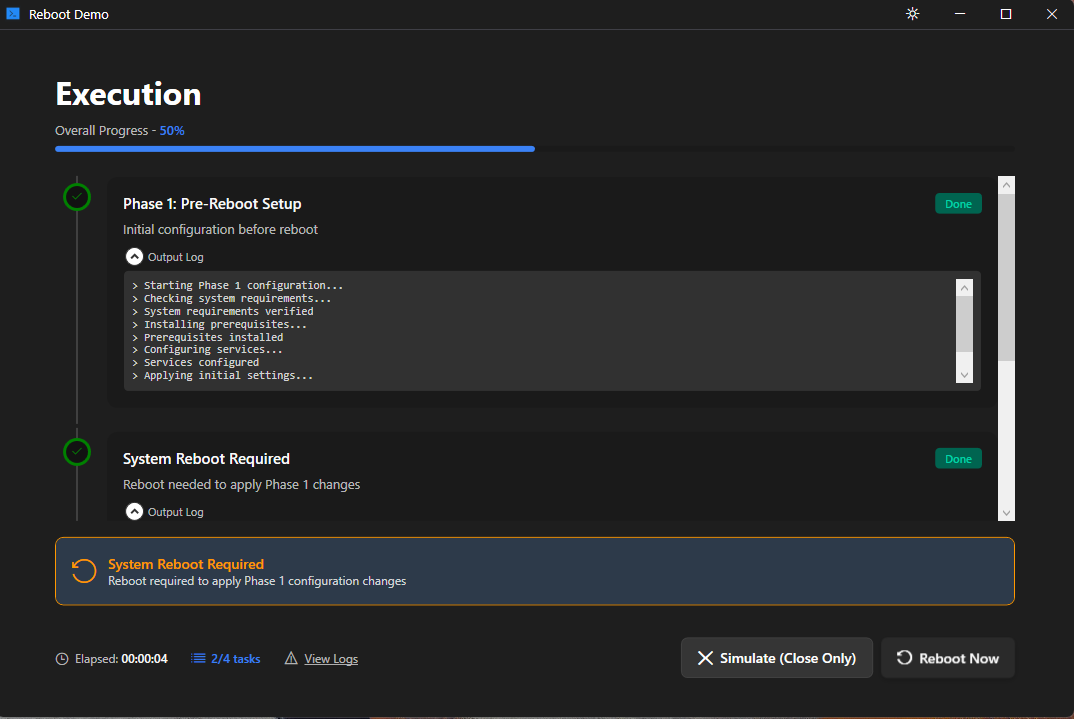
- Reboot & Resume: Workflows can save their state, request a system reboot, and automatically resume from the next task.
- CMTrace-Compatible Logging: Detailed execution logs are generated in a format familiar to IT professionals.
- Workflow Context: The
$PoshUIWorkflowobject provides methods for progress tracking, output logging, and reboot control. - PNG Icon Support (v1.3.0): Full-color PNG icons on wizard steps, cards, banners, and carousel slides.
- Dual-Mode Custom Themes (v1.3.0): Independent light/dark color palettes with runtime toggle.
- Theme Toggle (v1.3.0): Sun/moon button in the title bar for instant theme switching.
When to Use Workflows
Workflows are ideal for:
- Complex OS Configurations: Tasks that require multiple steps and potentially reboots.
- Application Suites Deployment: Installing multiple applications with dependency tracking.
- System Maintenance: Running a series of diagnostic and repair tasks.
- Infrastructure Provisioning: Orchestrating multiple automation steps with clear feedback.
Architecture
A PoshUI Workflow typically combines a Wizard (for data collection) with a Workflow execution engine.
- Wizard Phase: The user fills out forms to provide parameters for the automation.
- Workflow Phase: The engine takes those parameters and executes a series of tasks, showing real-time progress and output.
Quick Start
The simplest workflow has two phases:
powershell
Import-Module PoshUI.Workflow

# Initialize
New-PoshUIWorkflow -Title 'My Workflow'

# Phase 1: Wizard (collect user input)
Add-UIStep -Name 'Config' -Title 'Configuration' -Order 1
Add-UITextBox -Step 'Config' -Name 'ServerName' -Label 'Server Name' -Mandatory

# Phase 2: Workflow (execute tasks)
Add-UIStep -Name 'Execution' -Title 'Execution' -Order 2 -Type Workflow
Add-UIWorkflowTask -Step 'Execution' -Name 'Task1' -Title 'Doing Something' `
    -ScriptBlock {
        $PoshUIWorkflow.WriteOutput("Working on $ServerName...", "INFO")
        # Your logic here
    }

# Show the UI
Show-PoshUIWorkflow
Core Concepts
Progress Reporting
Choose between two approaches:
- Auto-Progress (
WriteOutput()): Simple, progress auto-advances with each status message - Manual Progress (
UpdateProgress()): Precise, you explicitly set progress percentage
See Progress Reporting Guide for decision tree and examples.
Data Passing
Three ways to pass data to tasks:
- Wizard Inputs: User-provided values, available to all tasks
- Task Arguments: Task-specific parameters via
-Arguments - $PoshUIWorkflow: Context object for progress, output, and reboot control
See Data Passing Patterns for detailed examples.
Reboot & Resume
Request system reboots and automatically resume after:
- Saves workflow state to disk
- Shows user reboot dialog
- Resumes from next task after reboot
- Automatically cleans up state file on completion
See Reboot & Resume for implementation checklist.
Documentation Map
- Creating Workflows - Basic structure and two-phase pattern
- Working with Tasks - Task types, patterns, and error handling
- Progress Reporting Guide - WriteOutput() vs UpdateProgress() decision tree
- Data Passing Patterns - Wizard inputs, task arguments, and $PoshUIWorkflow
- Reboot & Resume - Multi-phase workflows with reboots and state persistence
- Workflow Logging - Logging and CMTrace compatibility
Next: Creating Workflows